

To create a tenant workspace, see Onboarding a tenant.
Find a tenant
The Tenant List shows all tenant workspaces and their current status.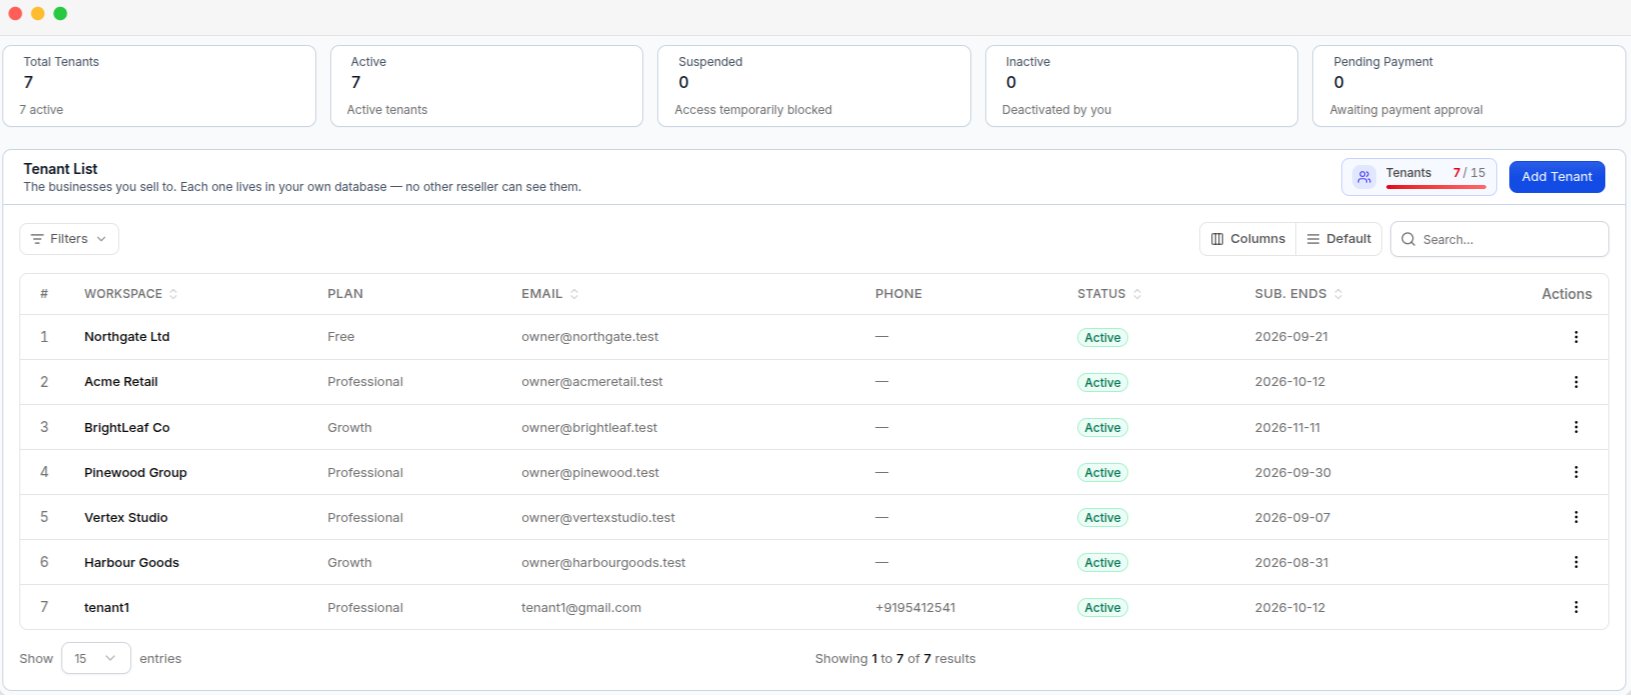
The Tenant List, with the status summary cards above it and the account counter beside Add Tenant
Tenant summary
Five cards at the top show the number of tenants in each status:Tenant list
- List controls
- Row columns
Tenant actions
Open the Actions menu at the end of a tenant row.Tenant detail page
Click View to open the tenant’s detail page.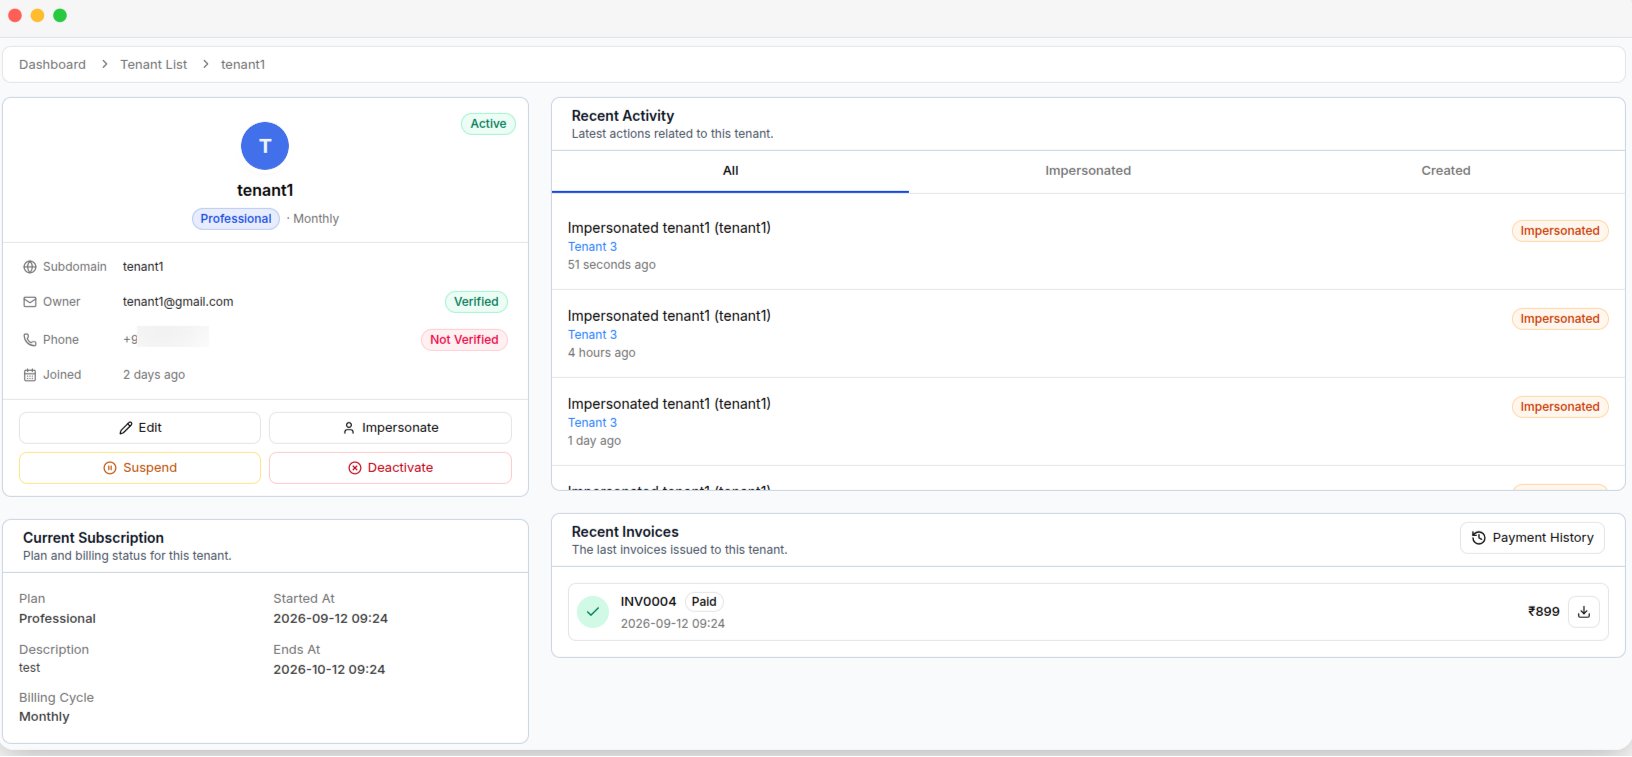
A tenant's detail page, with the profile, subscription, activity and invoices panels
Profile
Profile
Shows the tenant’s subdomain, owner email, phone number, join date, current plan, billing cycle, and account status. Email and phone numbers show Verified or Not Verified.Available actions are Edit, Impersonate, Suspend, and Deactivate.
Current Subscription
Current Subscription
Shows the tenant’s plan, plan description, billing cycle, and subscription start and end dates.
Recent Activity
Recent Activity
Shows the tenant’s latest activity. Use All, Impersonated, or Updated to filter the activity list.
Recent Invoices
Recent Invoices
Shows the tenant’s latest successful invoices, each with its status, date, amount, and download option. Select Payment History to view the full payment history, including failed payment attempts.
Change the tenant’s plan from Edit on the detail page.
Impersonating a tenant
Click Impersonate to open the tenant’s workspace as the workspace owner. This is useful for checking the tenant’s view or troubleshooting issues. An amber banner shows You are impersonating this tenant while impersonation is active.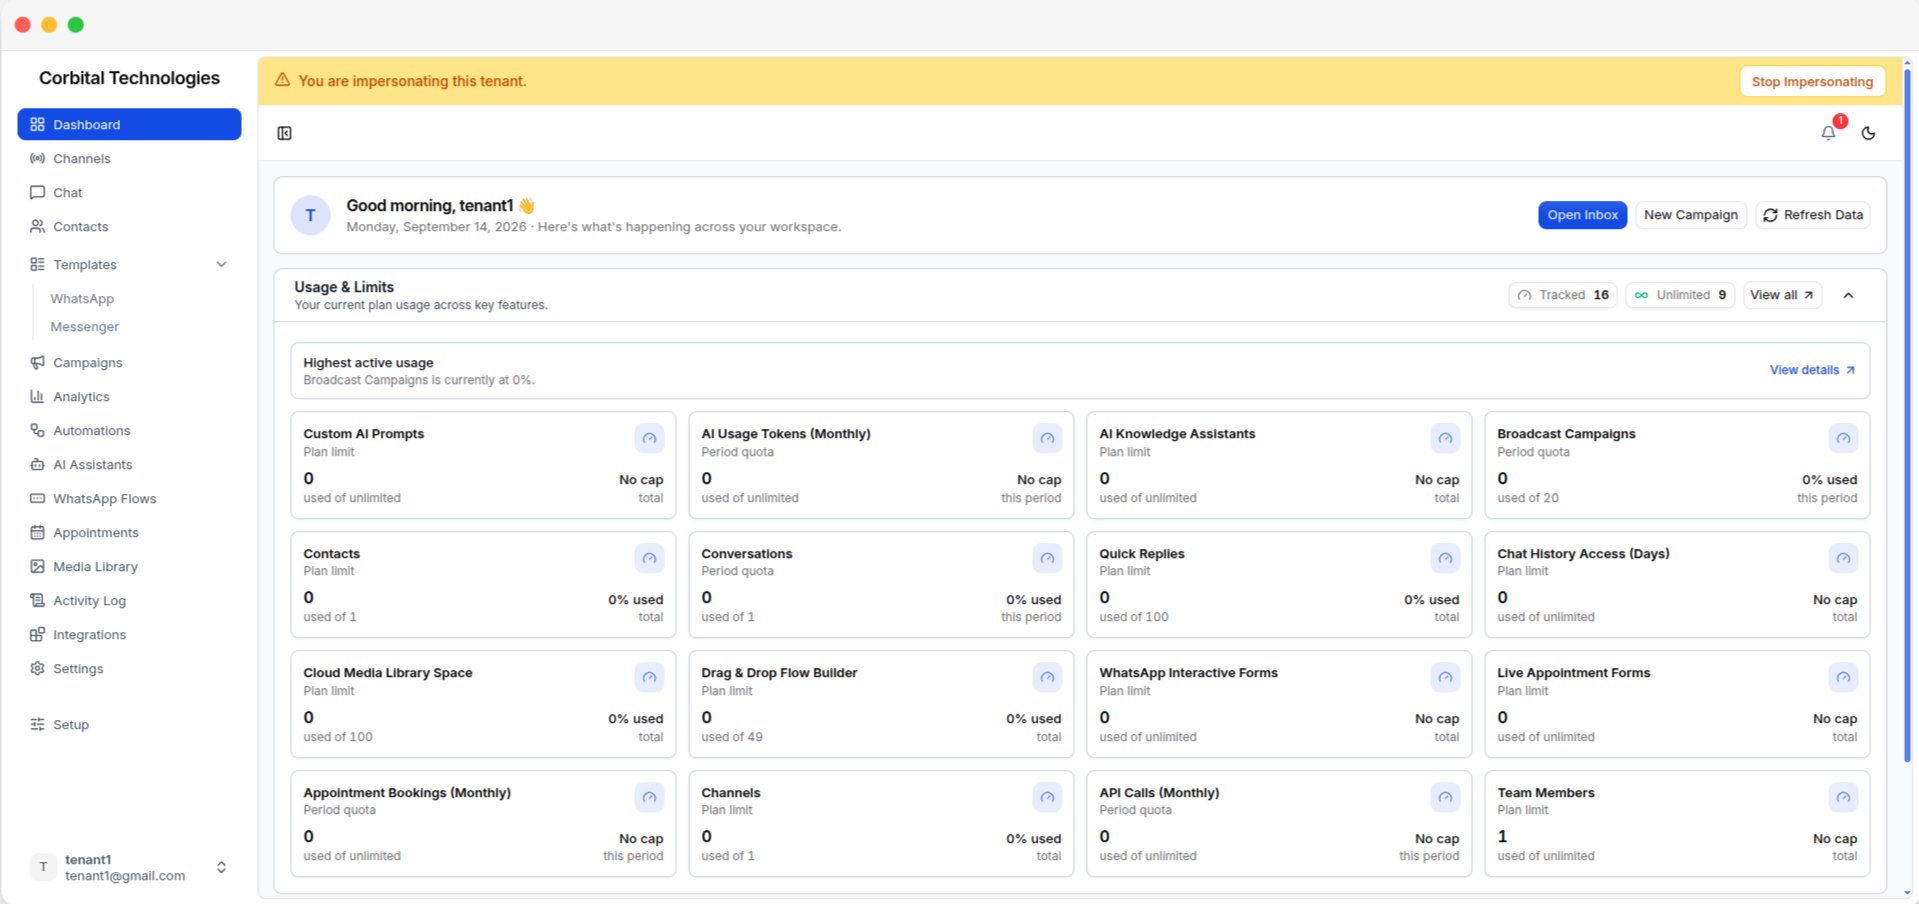
The tenant's workspace while impersonating, with the amber banner and Stop Impersonating button
Suspend, deactivate, and reactivate
Change tenant access from the tenant’s detail page.Tenants with Pending Payment status cannot be suspended or deactivated. The offline payment request must be reviewed under Offline Payments before the tenant can be activated.
Delete a tenant
Click Delete from the tenant’s row to open the deletion dialog. If the tenant has a subscription end date, these options are available:If the tenant has no subscription end date, only Instant delete is available.