

499 into a plan, the base currency is what decides whether that means 499 rupees or 499 dollars — and it is also what puts the right symbol (₹499) next to it everywhere your tenants see it.
This is separate from the currency you pay WaMatrix in for your own reseller plan. This setting only controls how you bill your tenants.
Why the base currency matters
Setting the currency is not a cosmetic preference — it unlocks and defines the rest of the billing setup.It unlocks plan creation
Plans cannot be created until a base currency exists. Every plan is automatically tagged with it.
It defines what your prices mean
A price of
499 is meaningless on its own. The base currency is what makes it ₹499 rather than $499.It sets the symbol everywhere
Your symbol is used on the storefront, the admin panel, invoices, PDFs, and billing emails.
It scopes taxes and coupons
Tax rates and fixed-amount coupons use the same currency as your plans.
Where the currency appears
Before you choose
Pick the currency you actually bank and settle in, then check it against the rest of your setup.Your payment gateway must accept it
Your payment gateway must accept it
Your tenants pay you through the payment gateways you connect. Confirm your gateway and merchant account can settle in your chosen currency before you go live.If a gateway cannot accept your currency, tenants will not be able to complete an online payment — you would be limited to offline payments, which settle in whatever currency you bank in.
It should match your plan pricing strategy
It should match your plan pricing strategy
Because there is no conversion, your base currency is also your pricing currency for every market you sell into. Choose the currency most of your tenants will pay in.
The ISO code becomes permanent once you sell
The ISO code becomes permanent once you sell
You can change the code freely while you are still setting up. Once a tenant holds an active subscription, the code is locked. See what you can and cannot change later.
Set the base currency
Go to Setup → Currency in the sidebar. The page shows a Base Currency card, plus a setup notice while no currency is configured.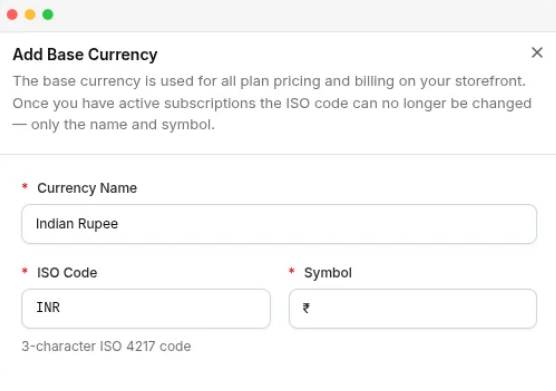
The Edit Currency panel, showing the Currency Name, ISO Code and Symbol fields
1
Open Currency
Go to Currency in the sidebar.
2
Click Add Currency
This opens the currency panel. The button is only shown while no base currency exists — one base currency per platform.
3
Fill in the fields
4
Save
Click Save. The currency appears in the Base Currency card and the Add Plan button becomes available.
What you can and cannot change later
Cancelled and expired subscriptions do not lock the currency — nothing further will be charged on them.
Next: create your plans
With a base currency set, the Add Plan button is enabled and every plan you create is priced in it.